Buttons
A button component can be used to respond to button presses, from buttons you create. You’ll need to create and send these buttons yourself, so let’s get started by creating a simple slash command to do so:
import { ButtonBuilder, ActionRowBuilder, ButtonStyle } from 'discord.js';import { command } from 'jellycommands';
export default command({    name: 'create-a-button',    description: 'Creates a test button you can press!',
    async run({ interaction }) {        // Create our button with the button builder        const button = new ButtonBuilder()            .setCustomId('test')            .setLabel('test')            .setStyle(ButtonStyle.Primary);
        // All components need to be in a "row"        const row = new ActionRowBuilder<ButtonBuilder>().addComponents(button);
        await interaction.reply({            content: 'Click the button below so we can test responding to it:',            // Send the row of components            components: [row],        });    },});
import { ButtonBuilder, ActionRowBuilder, ButtonStyle } from 'discord.js';import { command } from 'jellycommands';
export default command({ name: 'create-a-button', description: 'Creates a test button you can press!',
async run({ interaction }) { // Create our button with the button builder const button = new ButtonBuilder() .setCustomId('test') .setLabel('test') .setStyle(ButtonStyle.Primary);
// All components need to be in a "row" const row = /** @type {ActionRowBuilder<ButtonBuilder>} */ ( new ActionRowBuilder() ).addComponents(button);
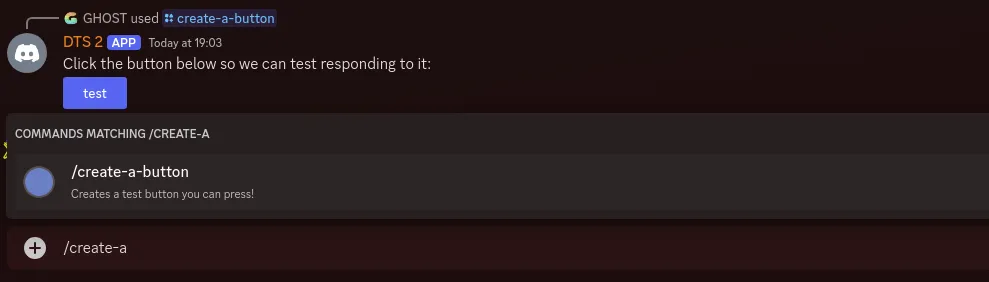
await interaction.reply({ content: 'Click the button below so we can test responding to it:', // Send the row of components components: [row], }); },});Once we run this command we now see a button in chat!
You’ll notice that when you click the button it fails:

This is where the JellyCommands comes in, it allows us to create a button component that can respond to button presses. All we need is the buttons “custom id”, which you might have noticed us setting in the above example.
import { button } from 'jellycommands';
export default button({  id: 'test',
  async run({ interaction }) {    await interaction.reply({      content: 'Hello World',    });  },});
Now when we click the button we see that it sends our “Hello World” response!

Custom Id
Each button needs to be given a “custom id” when you create it, so when you handle a button press you can use the correct handler. The simplest example, as we saw above, is just to use a static custom id.
import { button } from 'jellycommands';
export default button({  id: 'test',
  async run({ interaction }) {},});
Unlike commands, we don’t need to tell Discord about the buttons before we use them. They are effectively created every time you reply to an interaction with them. This means that our custom ids can be dynamic! This can simplify some interactions since we can store some information on the id. In order to make this possible the id option on a button component can also be regex or a function.
Regex
This regex will be used to see if we have found a match for the button interaction. It should always start with ^ and $ to ensure it’s matching the whole id rather than just a section of it, and not be global.
import { button } from 'jellycommands';
export default button({  id: /^page_\d+$/,
  async run({ interaction }) {    console.log(interaction.customId);  },});
Matcher Function
This function is passed the custom id, and then should return a boolean that indicates whether a match has been found.
import { button } from 'jellycommands';
export default button({  id: (customId) => {    return customId.startsWith('page_');  },
  async run({ interaction }) {    console.log(interaction.customId);  },});
Deferring
By default Discord requires you to respond to a button within 3 seconds, otherwise it marks the interaction as failed. Often it’ll take longer than 3 seconds to respond, so you need to “defer” your reply. If you defer your command you need to use followUp instead of reply:
import { button } from 'jellycommands';
export default button({  id: 'test',
  defer: true,
  async run({ interaction }) {    await interaction.reply('Hello World');    await interaction.followUp('Hello World');  },});